Back to Templates


Summary
This workflow listens for HubSpot contact creation events via a webhook, standardizes the data, and sends a WhatsApp message using a predefined first contact template from Beex.
How It Works
- Configure Webhook: The workflow is triggered when HubSpot fires the
On Contact Createdevent. - Get Contact: Retrieves the contact's ID and extracts relevant data from the HubSpot event.
- Validate Contact: Filters contacts to ensure they meet the requirements in this case, having valid (non-null) email and phone numbers.
- Set Fields: Transforms the HubSpot data by selecting only relevant fields, renaming them for clarity, and preparing them for the template. Key tasks include extracting the
phone_numberandcountry_code(removing the "+" symbol) and setting theassociated_valuesas required by the template. The exact template name must be specified manually in this node.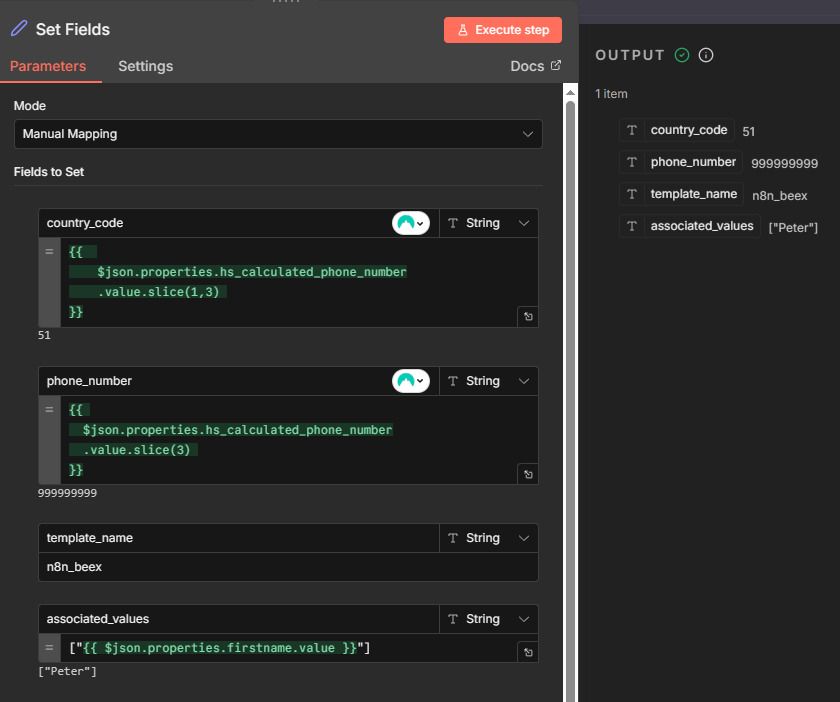
- Send Template: Sends a welcome message via WhatsApp using the template configured in Beex. This node requires a
Queue ID, which is generated based on the template configuration in Beex (see the setup section below for details).
Setup Instructions
- Install Beex Nodes: Before importing the template, install the Beex trigger and node packages using the following package name:
n8n-nodes-beex
-
Configure HubSpot Credentials: Set up your HubSpot connection with the following:
- Access Token (typically from a private app)
- Read permissions for Contacts objects
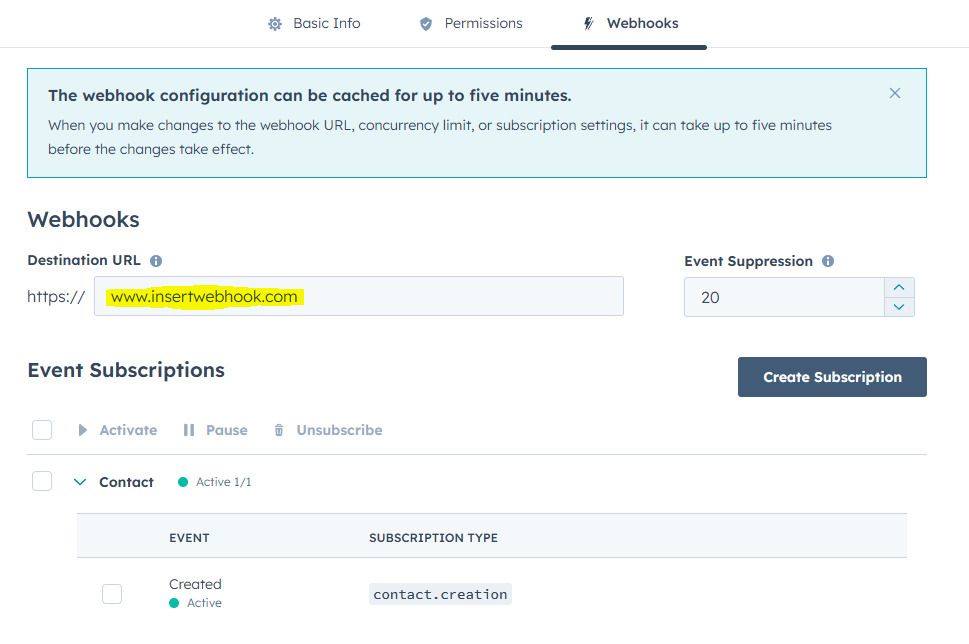
- Configured webhook URL (usually from a private application)
- Note: The webhook URL can be found in the initial node. Make sure to distinguish between test mode and production mode.
-
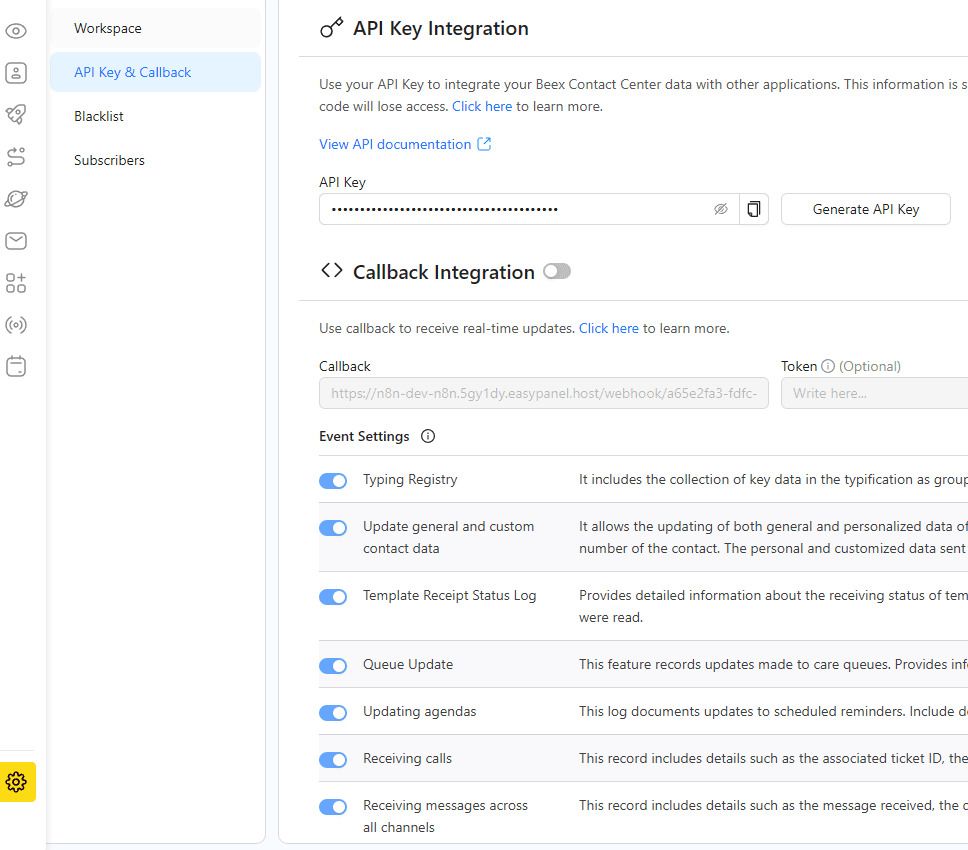
Configure Beex Credentials: For Beex users with platform access (for trial requests, contact [email protected]):
- Navigate to Platform Settings → API Key & Callback.
- Copy your API key and paste it into the Beex node (Send Template) in n8n.
-
Configure Template in Beex:
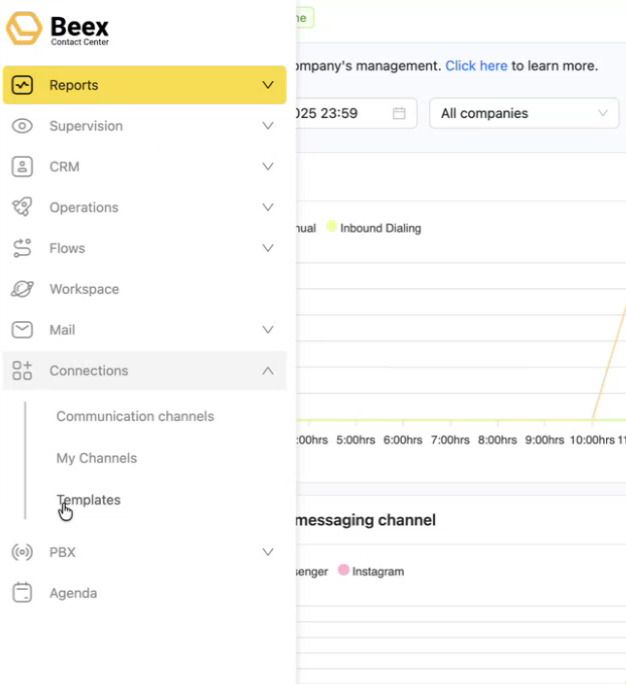
- On the Beex platform, go to the Connections section in the side menu and select Templates.
- Select an identifier (a number through which the WhatsApp template will be sent to your contacts).
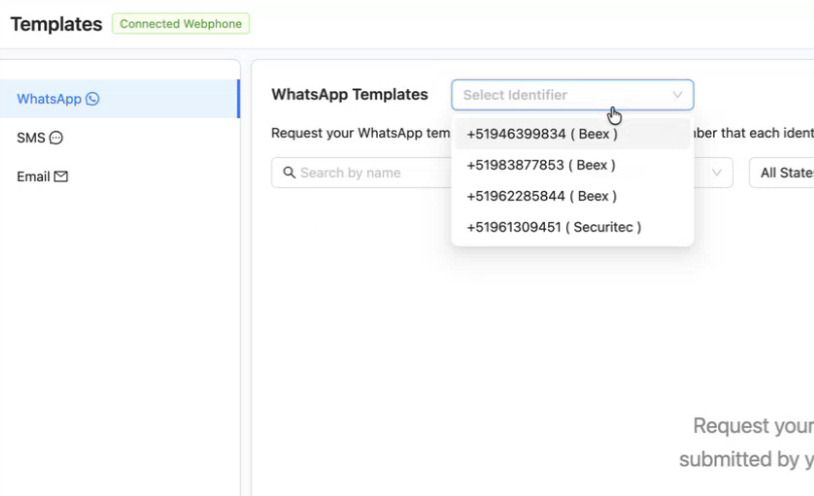
- Click to request a new template.

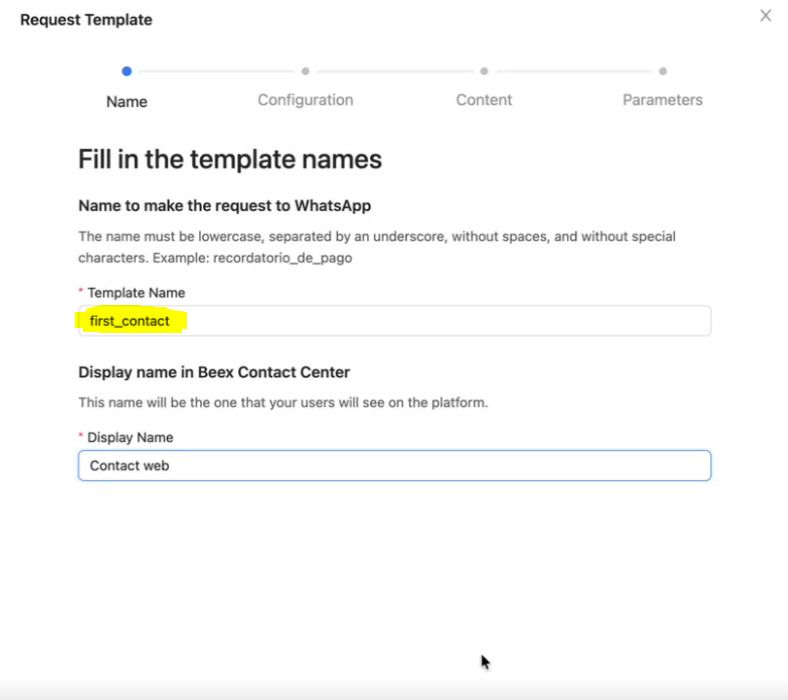
- Enter a Template Name and Display Name. The "Template Name" is what you'll reference in your workflow's Set Fields node.
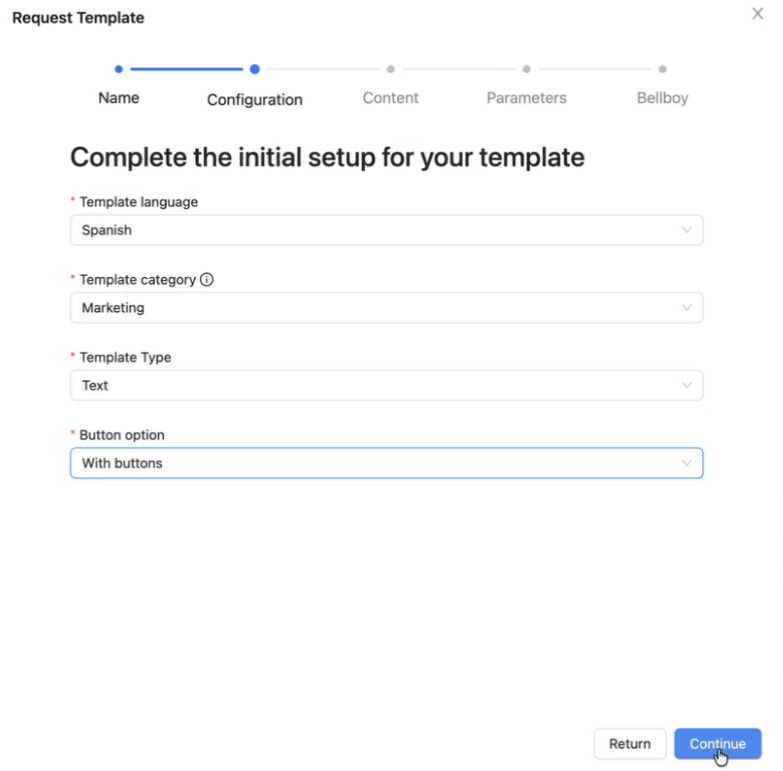
- Complete any additional required fields.
- Configure the template message content. Note that associated values are wrapped in
{{1}}, which corresponds to the configurable parameter set in the Set Fields node.
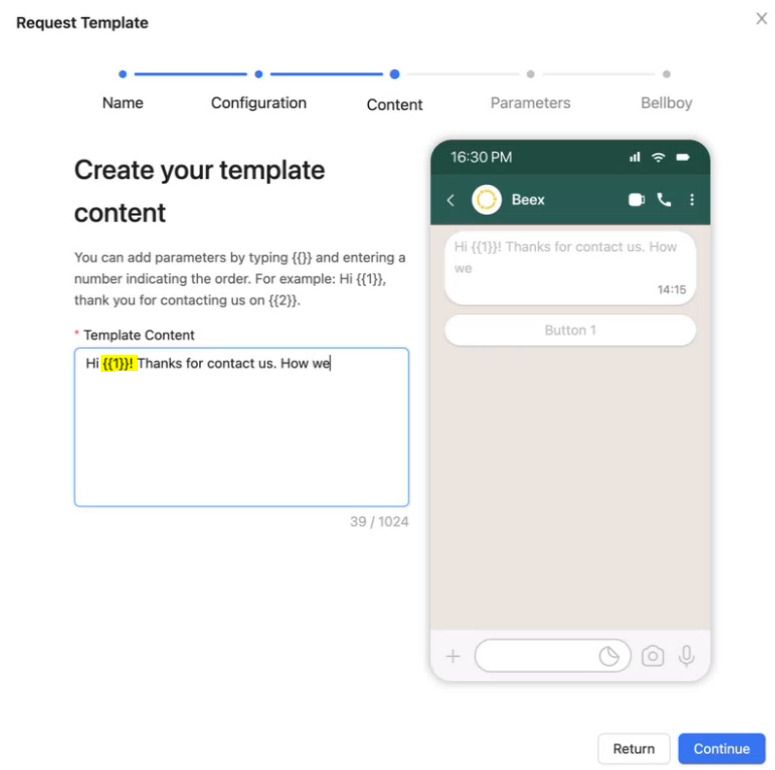
- Optionally, add buttons to the template.
- Once the template request is submitted, wait for approval. After approval, associate the template with a campaign and queue to obtain the Queue ID needed for the Send Template node.

- On the Beex platform, go to the Connections section in the side menu and select Templates.
Requirements
- HubSpot: An account with a private application token and read permissions for Contacts objects.
- HubSpot: A private application with a configured webhook.
- Beex: An account with permissions to send templates.
- Beex: A properly configured and approved template with an associated Queue ID.
Customization Options
- Additional Filtering: You can add a filter immediately after the webhook that receives the contact creation event to limit the sources from which you obtain new contacts (for example, contacts from a specific HubSpot form).
- Get Contact: For this workflow, the contact's first name is used in the template. If your template requires additional associated values, you can retrieve more properties from the HubSpot node by adding them to the properties list.
- Contact Filtering: Add filters to control which contacts should trigger the WhatsApp template based on your business logic.
- Set Fields: Use this node to further customize and transform the data received from HubSpot. For example, you can standardize phone numbers by region or add custom logic for field mapping.
- Send Template: The WhatsApp template is fully customizable within Beex. Refer to the template configuration section to ensure all associated values are properly mapped.